
Template Builder
The template builder provides a visual drag-and-drop interface for building reports. Templates control the PDF layout of each report generated, can be re-used across multiple reports.
Managing Assets
A number of template components have been included by default. For a fresh install, visit the Manage Assets page and run the Scan Asset Directories action once to update your components. Be sure to scan for changes again any time you manually change the template files.
You can duplicate and edit one of the built-in template files, as a basis for customising your reports. Template files are written in HTML and Twig template-tags, with some YML front-matter at the top for important settings. Check out the Twig Documentation for more info about templating.
Creating a Template
To create a new template, visit the Template Builder click Add to setup the basic document details, such as the page size, layout, and margins. The context determines whether the template will be used for reporting cycles (eg: report cards), or whether it is generated from student enrolment data (eg: transcripts).
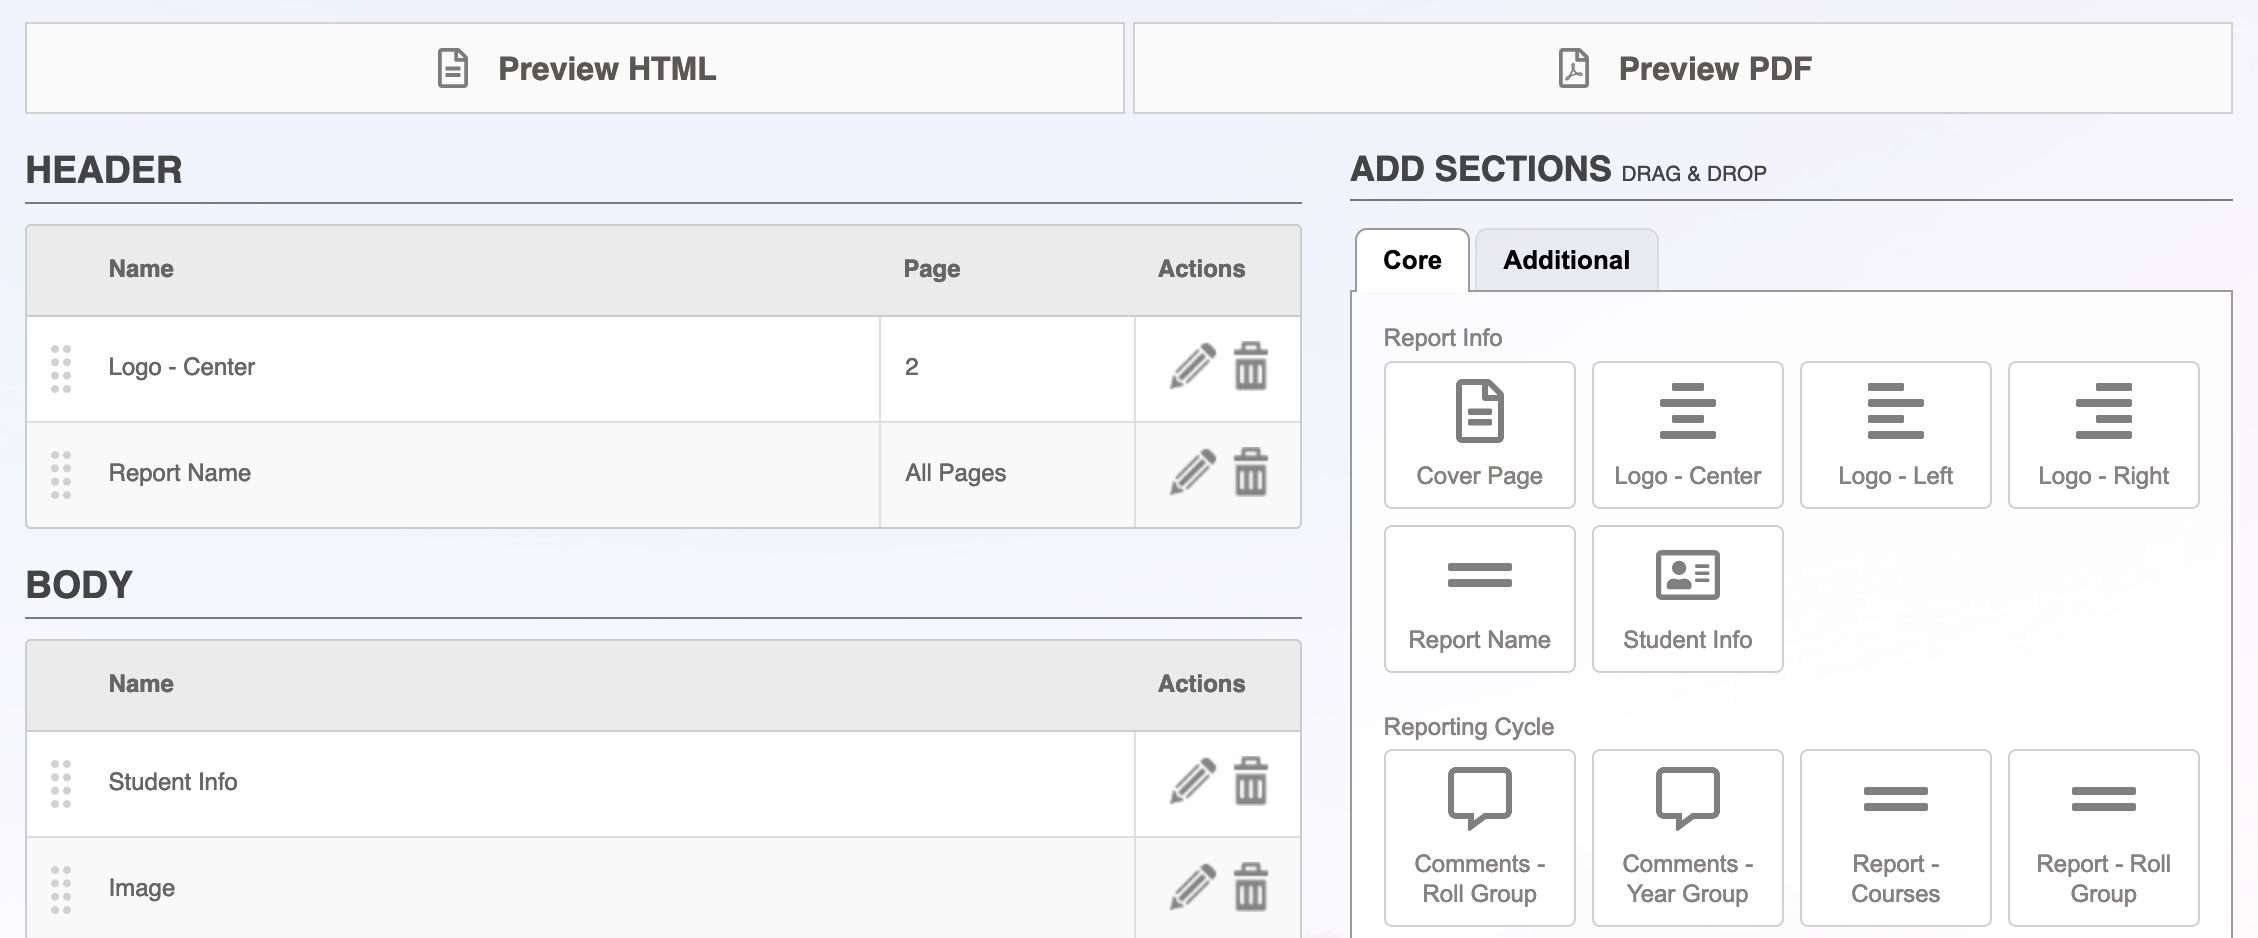
Preview: Each preview uses a set of fake data, which enables you to rapidly generate sample reports without exposing any private student information. The HTML preview provides a quick approximation of a report. It is for sample purposes and may not be an exact match to the final PDF. The PDF preview is a more accurate representation of the report template.
Add Sections: Add a section by dragging it from the right-side into either the Header, Body, or Footer of the report. You can drag and re-arrange sections on the left-hand side. There is a tab for Core template components, and any templates you have customised will show up under the Additional tab. You can preview a template section before adding it to your report with the hover-over icon in the top-right of the component.
Edit Sections: Each section you add to the template can have a number of settings. There are a number of Flags which are used to control page-breaks and other properties of the generated document. There are also a number of Configuration options that depend on the type of template component. For example, the Signature Box component lets you specify a digital signature image file, image height, and title.
Headers & Footers: These are special sections that can show up on the top and bottom of your report. You can have more than one header and footer, and specify specific pages for each. For example, you may have a header with a logo on the first page of the report, and a simple header with report info on all other pages.
Using Custom Fonts
The template builder can support custom fonts, enabling full UTF-8 support for your reports, including CJK characters. This will generally require some template editing, to either apply the font to your entire report or to select areas.
- Be sure to scan your asset directory in Template Builder > Manage Assets to see your available fonts. If they are not listed as installed, check the file permissions of the font files in your system.
- If you have a custom asset directory set in Reports > Reports Settings, be sure to add your font files into a /fonts folder inside this directory (eg: /uploads/img/reports/fonts/YourFontName.ttf)
- If you're using the mPDF renderer, the font family name needs to be lowercase with no special characters and match the "File Name" listed in the font definition (not always the same as the filename in your system.) Click the pencil next to the font in Manage Assets to check these settings and make changes.
- After scanning and setting the font family name, be sure to edit your template in Template Builder and select the font in the list at the top of the template settings. For mPDF, you should see it lowercase, otherwise be sure to change it in Manage Assets.
- You can now apply the font in your templates using the CSS font-family attribute and the lowercase name of your font family (eg: yourfontname);
- This can be done for specific areas the template by editing your templates and applying the style="font-family: yourfontname" attribute to an HTML tag.
- This can also be set by using a stylesheet. Duplicate the default stylesheet in Manage Assets, give it a distinct filename and edit it to change the name at the top of the template definition. You can apply your font-family attribute using CSS rules in the stylesheet. Once you have setup your stylesheet, be sure to edit your template in Template Builder and select your custom stylesheet.
- If your font is not showing up in your reports, be sure to check that the font family used in your CSS matches the one listed in Manage Assets, and that the font is selected at the top of your template options in Template Builder.
Developer Info
The Reports module is new as of v19. We will be expanding on the template functionality and providing more developer info in the upcoming versions. Currently, the template functionality uses the limited HTML capabilities of the TCPDF library for PHP, and not all HTML tags or CSS attributes are supported. The PDF library may change in the future to enable better CSS support.